OpenSDL desktop experiment quickstart
In this tutorial, you will run a simulated UV–Vis spectroscopy experiment in the LiyanLabs desktop app. You will set up a virtual lab, ask AI to draft an experiment, watch the instruments execute it, and use the readings to plan a second scan.
Sign in to the desktop app and check that your computer is online in the Plugins workspace. This tutorial requires OpenSDL 0.6.3 or later and a client with the Simulation and Experiment Workflow tabs. The screenshots show the Chinese desktop app.
1. Install and enable OpenSDL
Open Plugins in the sidebar. If the version is available in your catalog, search for OpenSDL under Discover, open its details, and select Install. If you were given a compatible OpenSDL package instead, select Import Local Plugin, then Choose Plugin Folder or Archive, and select the .tar.gz file. The screenshot shows the local package route.

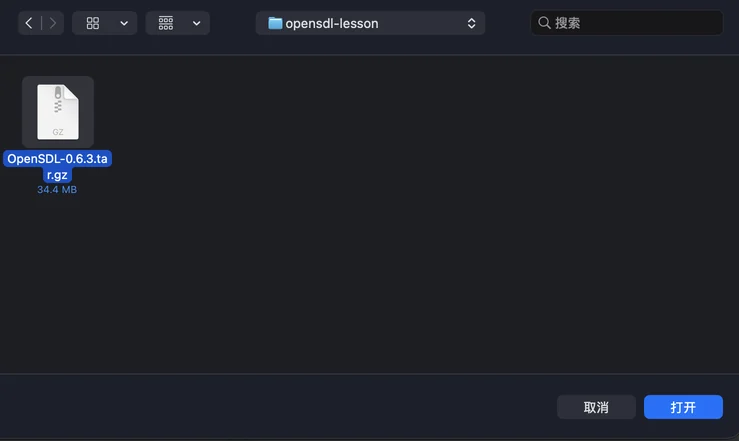
Confirm the device, review the requested permissions, and enable the plugin. If you already have OpenSDL, the action may say Update. Follow the prompts to enable the updated installation, then open OpenSDL under Installed.
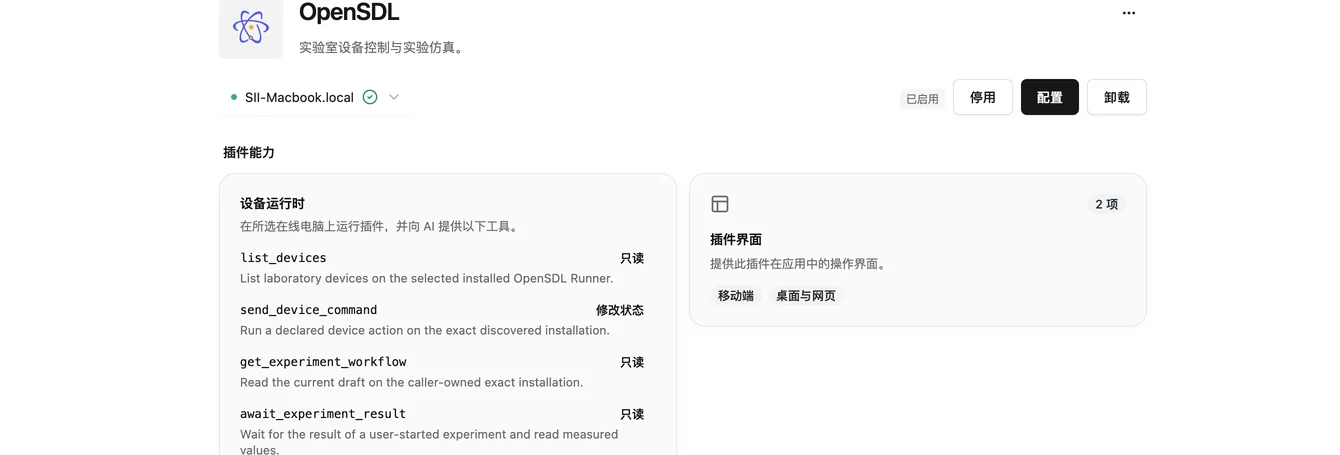
2. Start the local laboratory
In the OpenSDL details, select Configure. Under Laboratory connection, select This computer only, select Start, and confirm the connection. Close configuration once the status reads Connected. Local mode does not require an address, access key, or equipment file path.
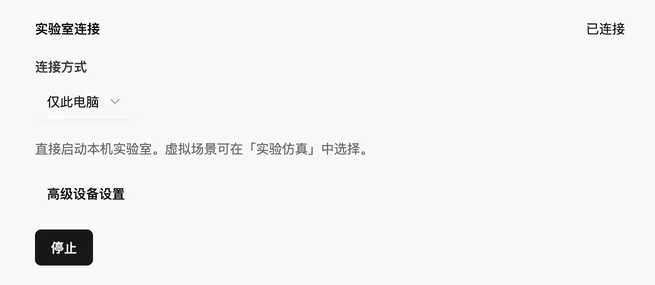
3. Create a simulation in a conversation
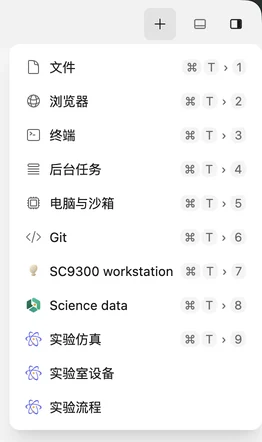
Start a new conversation and select the online computer on which you installed OpenSDL. If the right panel is collapsed, select Expand Right Panel at the top right. Click + in the workbench and select Simulation.
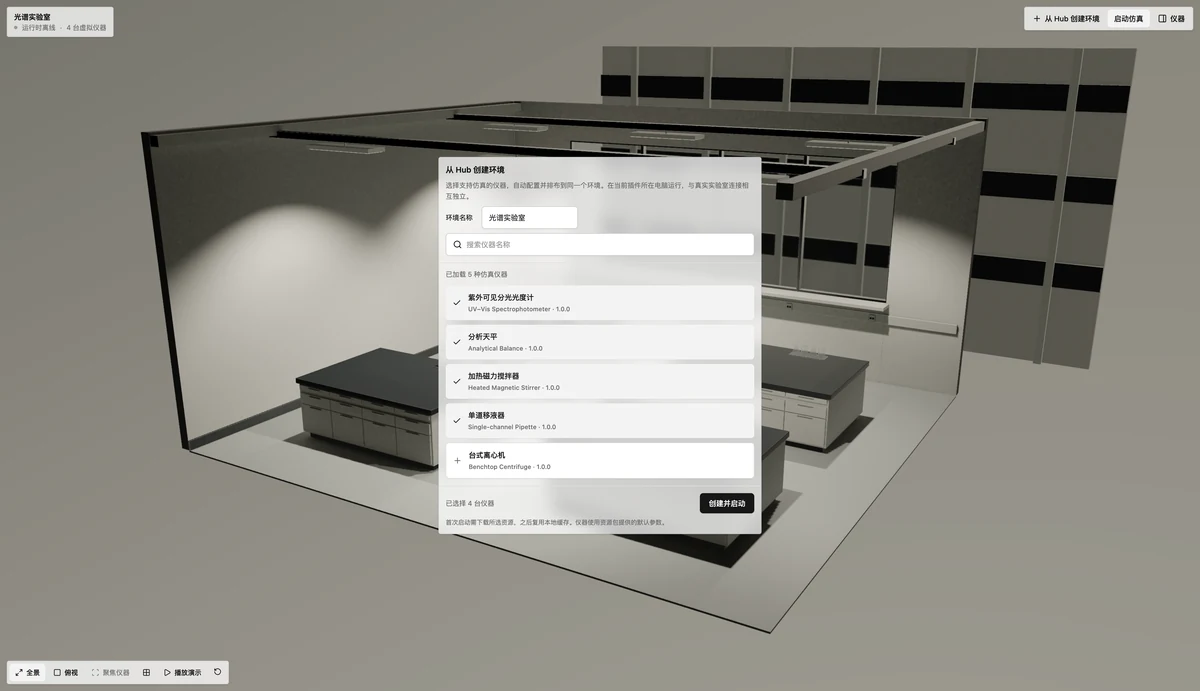
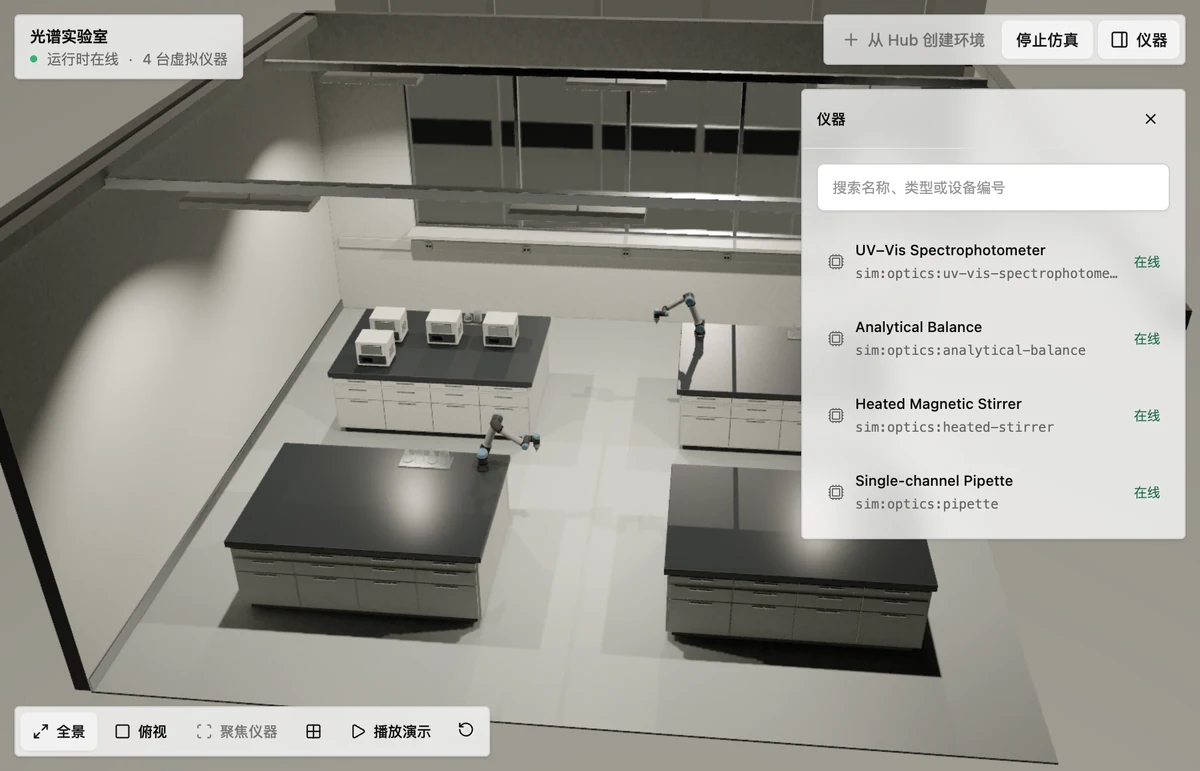
Select Create Environment from Hub to open the panel over the 3D scene. Click outside the panel to close it. Name the environment, select a UV–Vis spectrophotometer, analytical balance, heated magnetic stirrer, and single-channel pipette, then select Create and Start. The first launch downloads the instrument models. Wait for the runtime to show Online. Select Instruments to see the list, or select an instrument directly in the scene. Later, you can restart the saved environment directly from this tab.
4. Ask AI to design an experiment
Describe what you want to learn. For example:
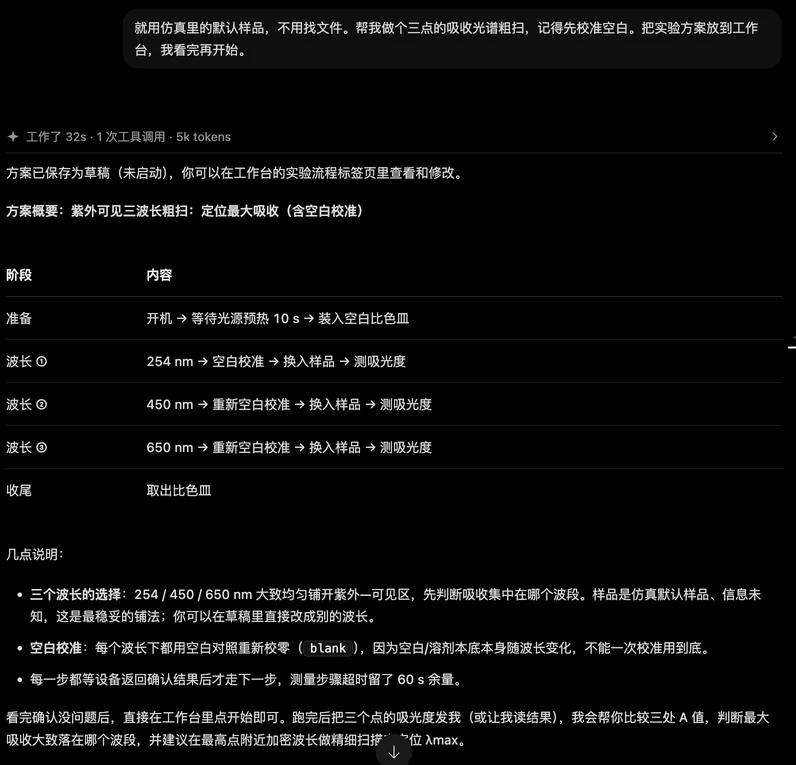
Use the default sample in the simulation. There is no file to look up. Can you plan a three-point absorption scan with a blank calibration? Open the lid when changing cuvettes and close it for calibration and measurements. Put the plan in the workbench so I can review it before starting.
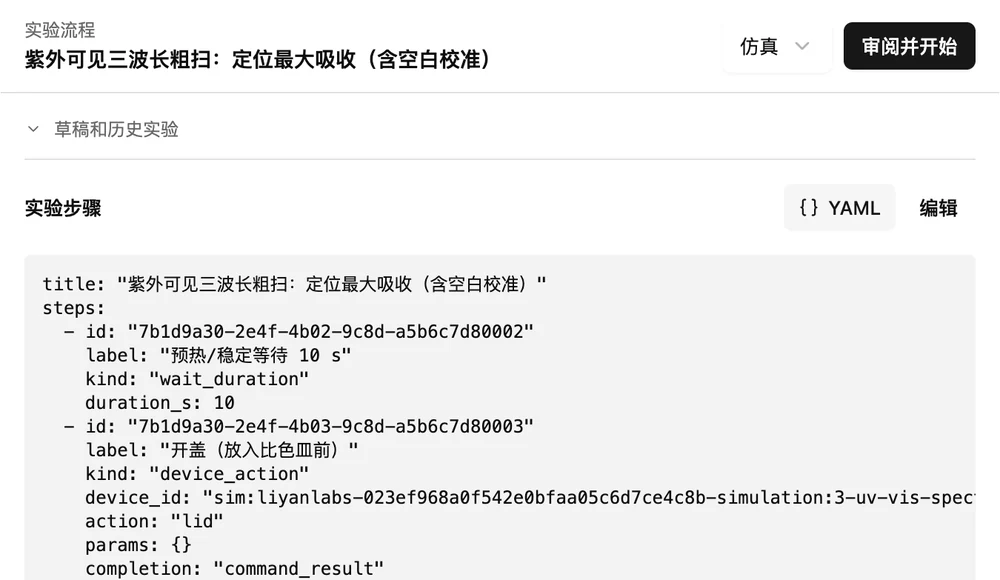
Wait for AI to save the draft. If the app asks permission to save a local draft, review the request and allow it. Saving a draft does not run the instruments. Select + → Experiment Workflow and open the plan from Drafts and previous runs. If the reply includes a workflow link, you can also open it directly.
5. Review and run
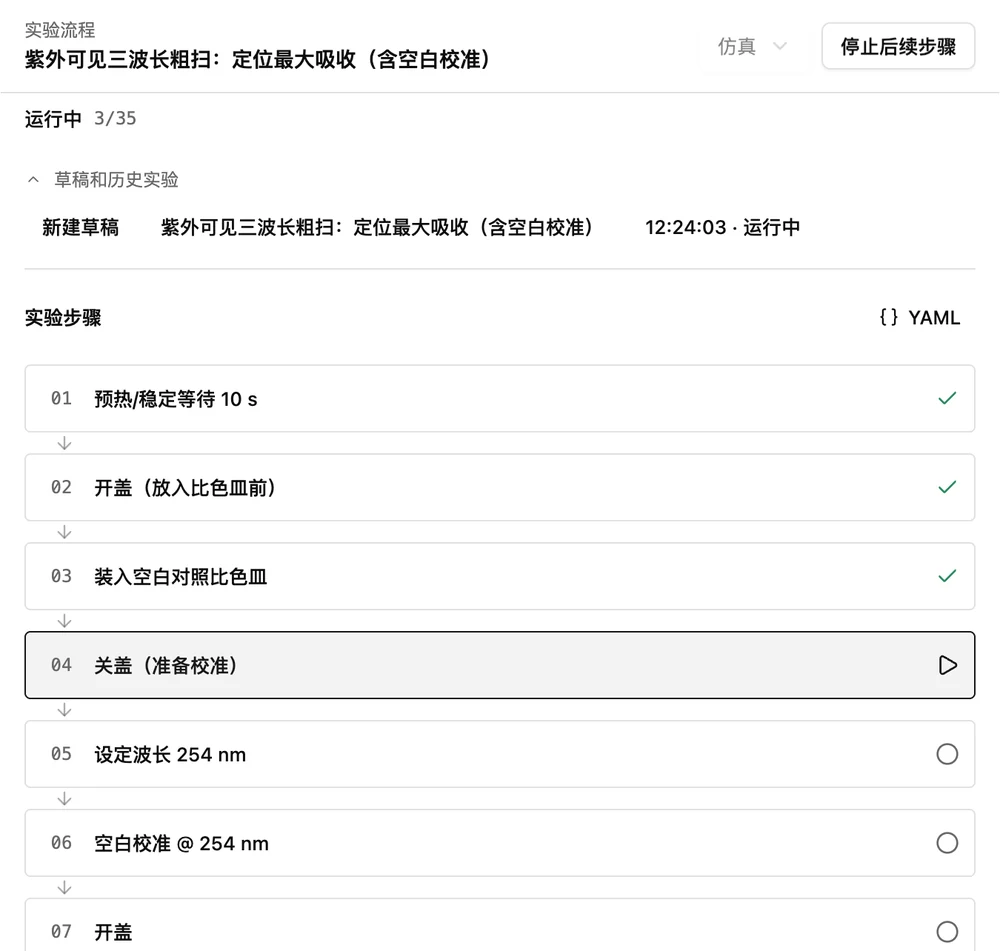
Confirm that the target is Simulation. In Experiment Workflow, expand a step to check its instrument, action, wavelength, or calibration order. The YAML view shows the same plan. Select Review and Start, check the target and instruments in the confirmation dialog. Expand View steps to check individual parameters, then select Start Experiment. Experiment Workflow highlights the current step and shows overall progress. Switch to Simulation to watch the instruments. The run continues while you switch tabs; return to Experiment Workflow to see the latest progress. Select Stop remaining steps if you need to end the run. If a step fails, open its details and ask AI to revise the draft before you retry.
6. Read the results and plan a second scan
The workbench shows the recorded absorbance after the run. In the same conversation, try:
Which wavelength gave the highest reading? Pick three more points near it for a closer scan and save a separate plan.
To have AI read the result when a run finishes, keep the conversation open and say before you start: “I’m about to run this plan. Please look at the results when it finishes.” Review and start the follow-up draft the same way. The readings shown here are from the simulation. The highest reading is the highest among the sampled points.
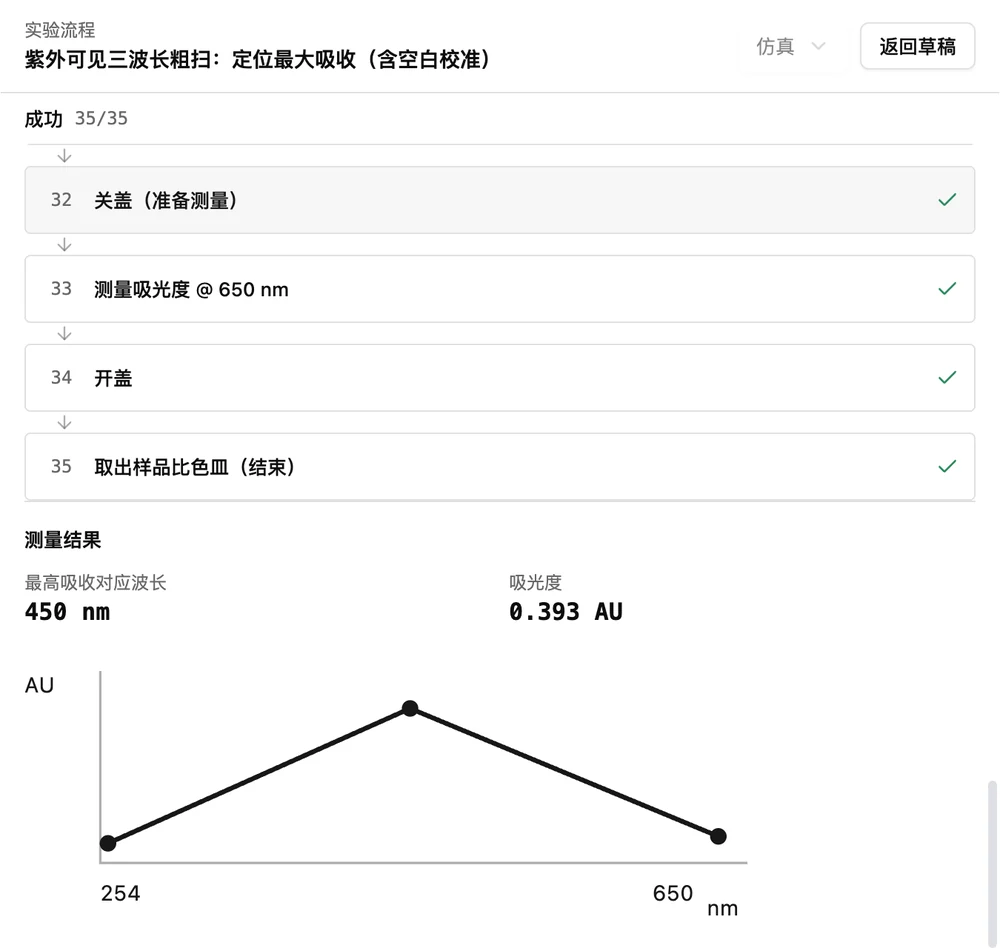
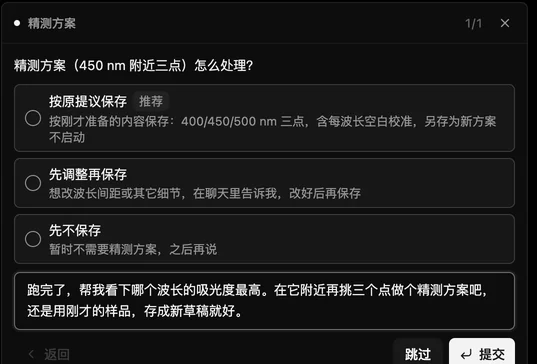
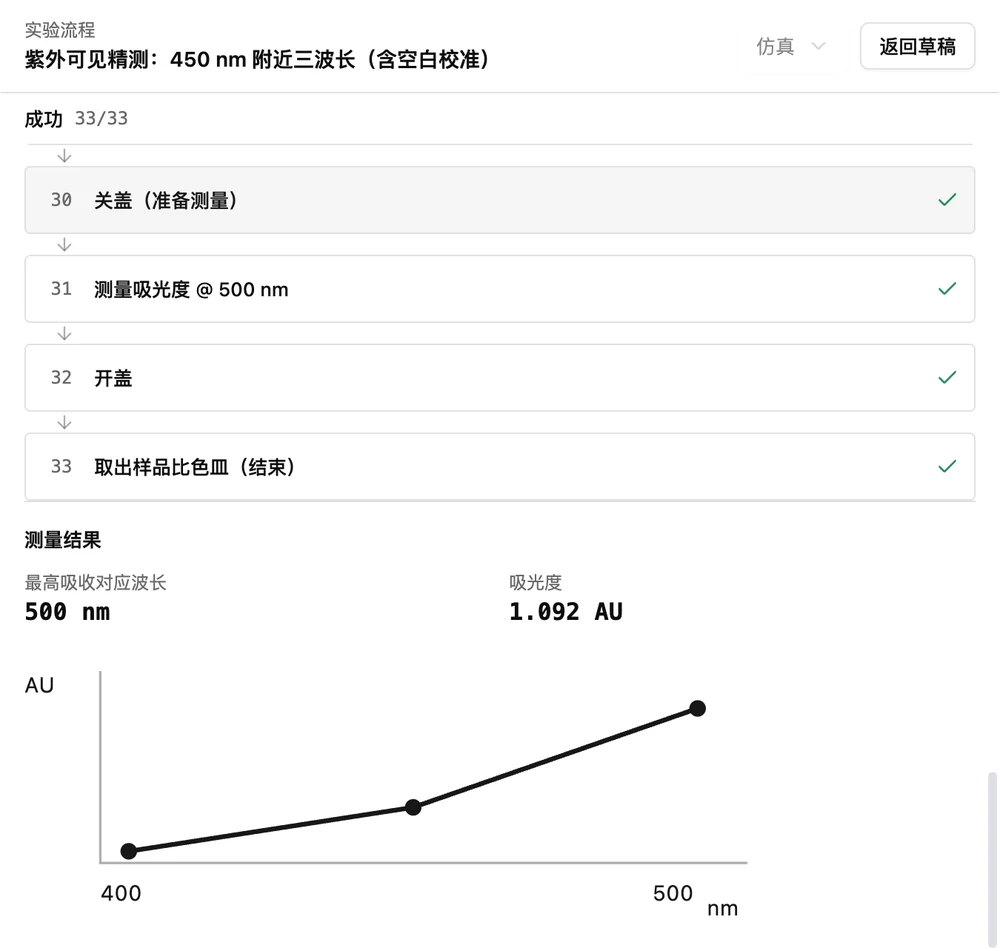
The first scan sampled 254, 450, and 650 nm; the highest reading was 0.393 AU at 450 nm. AI saved a closer scan at 400, 450, and 500 nm. Open the new draft and repeat step 5. The highest sampled reading in the second scan was 1.092 AU at 500 nm. Review the draft’s starting conditions before running; if you restarted the simulator, check the instrument state first.
Move a plan to a physical laboratory
Change the draft target to Physical laboratory and bind each step to a compatible instrument. Reuse the actions and units where the real instrument supports them, validate the plan again, and review the new start confirmation. A physical run requires device write permission. The simulated readings in this tutorial are not physical measurements.